Thoughts on airbrush booths


I’ve been building Gunpla for a while now, and if there’s one thing I’ve come to appreciate, its having a decent airbrush booth. Now having recently moved to America, I had to get rid one my one that I hacked together years ago. I figured that since I now live in the land of the plenty, I would be able to buy one that’s got all the bells and whistles for an affordable price.
Well it turns out, that after months of searching, every option available is either absolute garbage, or so expensive that you have to wonder what on earth these things are made of.
Why do I need an airbrush booth
When you start taking model building (and painting) very seriously, you will invariably end up working with chemicals that are incredibly toxic and carcinogenic. Paints that are very corrosive such as lacquer and enamel are thinned using chemicals that are super toxic. You will often find professionals advising you to also wear a mask that can filter out these harmful chemicals while you paint. Apart from the paint itself, the chemicals used to clean airbrushes and even the chemicals used to weld plastic together, are equally as harmful. You therefore want to extract these fumes immediately as they are sprayed before they even get the chance to enter your lungs.
The other consideration is whether to run the extracted aerosols back through a HEPA filter, and then back into your room. Personally, I prefer to get these chemicals out of the house and not take any chances, not only because they can be harmful to the body if not all chemicals are absorbed, but also because they could potentially cause issues with detectors and gas installations. This further limits what options are available when searching for something decent.
The cheap options
If you run a search on Amazon for airbrush booths, you basically get fed a plethora of products that all look relatively the same. I’m talking about these guys:
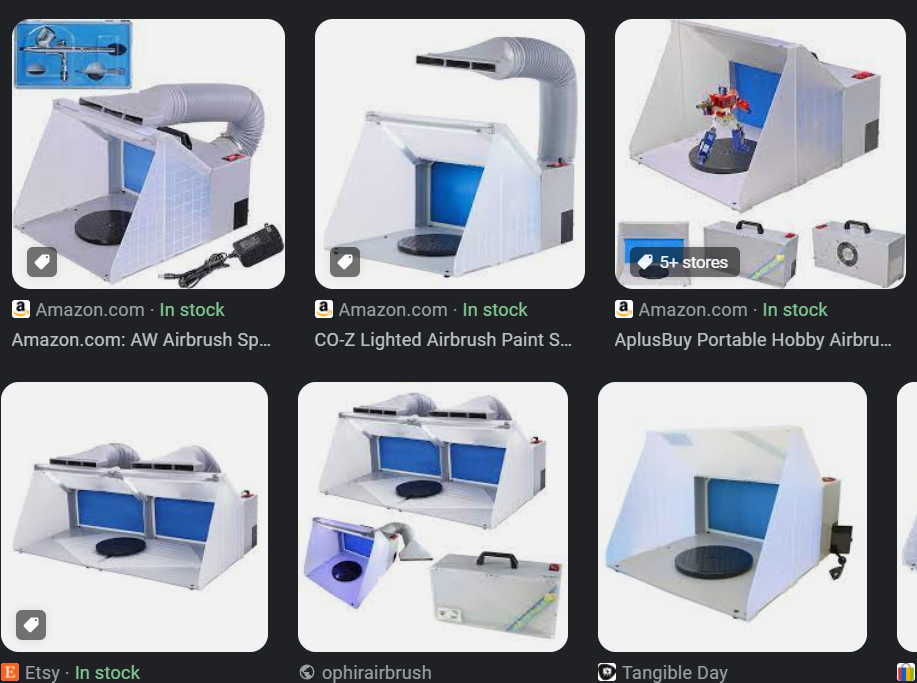
You would think that given the popularity of these things, that it would be a reasonable choice. Wrong. The problem with essentially all of these is that they have an extremely low air flow CFM (Cubic Feet per minute). They all run something along the lines of 4CFM because they run (even the more expensive ones) one or two simple computer fans as their air flow pump.
What makes this product worse in my opinion, is there are many sites that claim they are decent, when they are clearly getting paid to promote them. I have even seen a few youtubers reviewing them, showing the suction power via some kind of incense stick, while even demonstrating that half the aerosols just simply escape unless you spray directly against (or in extreme proximity to) the foam.
The only good thing I saw about these items, is that because they are almost the only items available on most online stores, they have spare parts available on the cheap, and readily available.
The expensive option
If you were interested in buying one of these but clearly did your homework and went through many reviews, you probably went on the hunt like I did for something that’s almost infinitely better. You may have or probably then ended up finding out about the BenchVent.
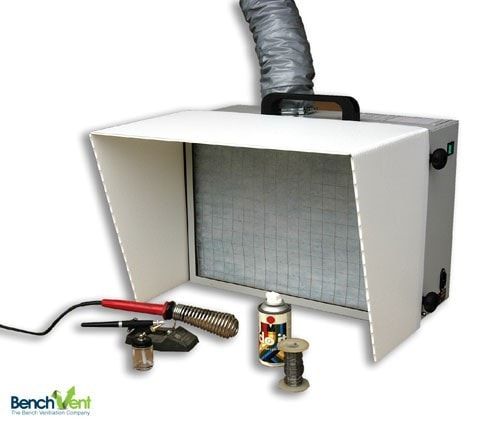
This appears to be an awesome airbrush booth that’s both versatile but also incredibly expensive, with spare filters following the same pattern. If you look into the specs of this guy, you will find that its got an incredibly high flow rate, essentially the most important quantitative value when looking at an airbrush booth. The other surprising aspect of this model, is that it is manufactured in the UK, which means if you want to get this internationally, you have to find a supplier such as Strike Hobbies.
So what now
“Fine” I said anyways, and decided I was going to purchase one. To my surprise however, at the time of writing, there are no available units, and stock in the USA was only set to arrive mid July (several months from now). Once they confirmed this via email, it became clear that I was going to need another option.
there are many designs you can find online and on YouTube, but I found most of them to be over-designed, low powered or just not simply up to the task.
After giving it some thought, id like to present to you all, what I now truly believe is the best possible way to build an airbrush booth for cheap, quickly, with simple parts and with an extremely high CFM.
How do I make one
You can get basically all of this from HomeDepot. First get the parts:
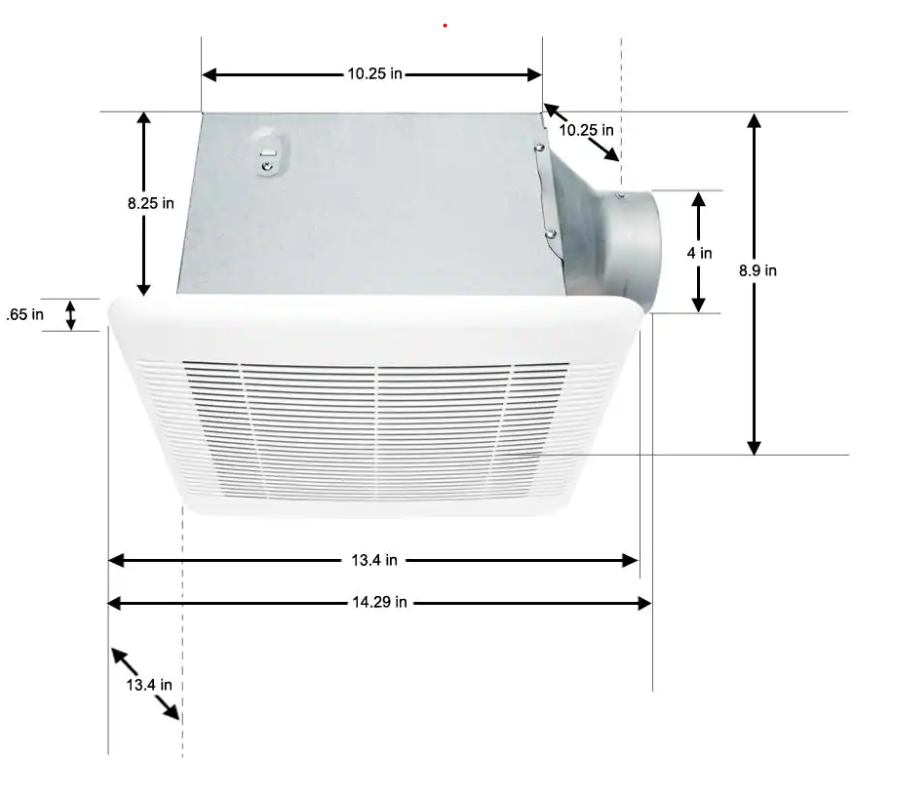
A high volume bathroom extractor fan:
This one from Hampton Bay was around 90USD and it has CFM of about 110 (which is a ton)
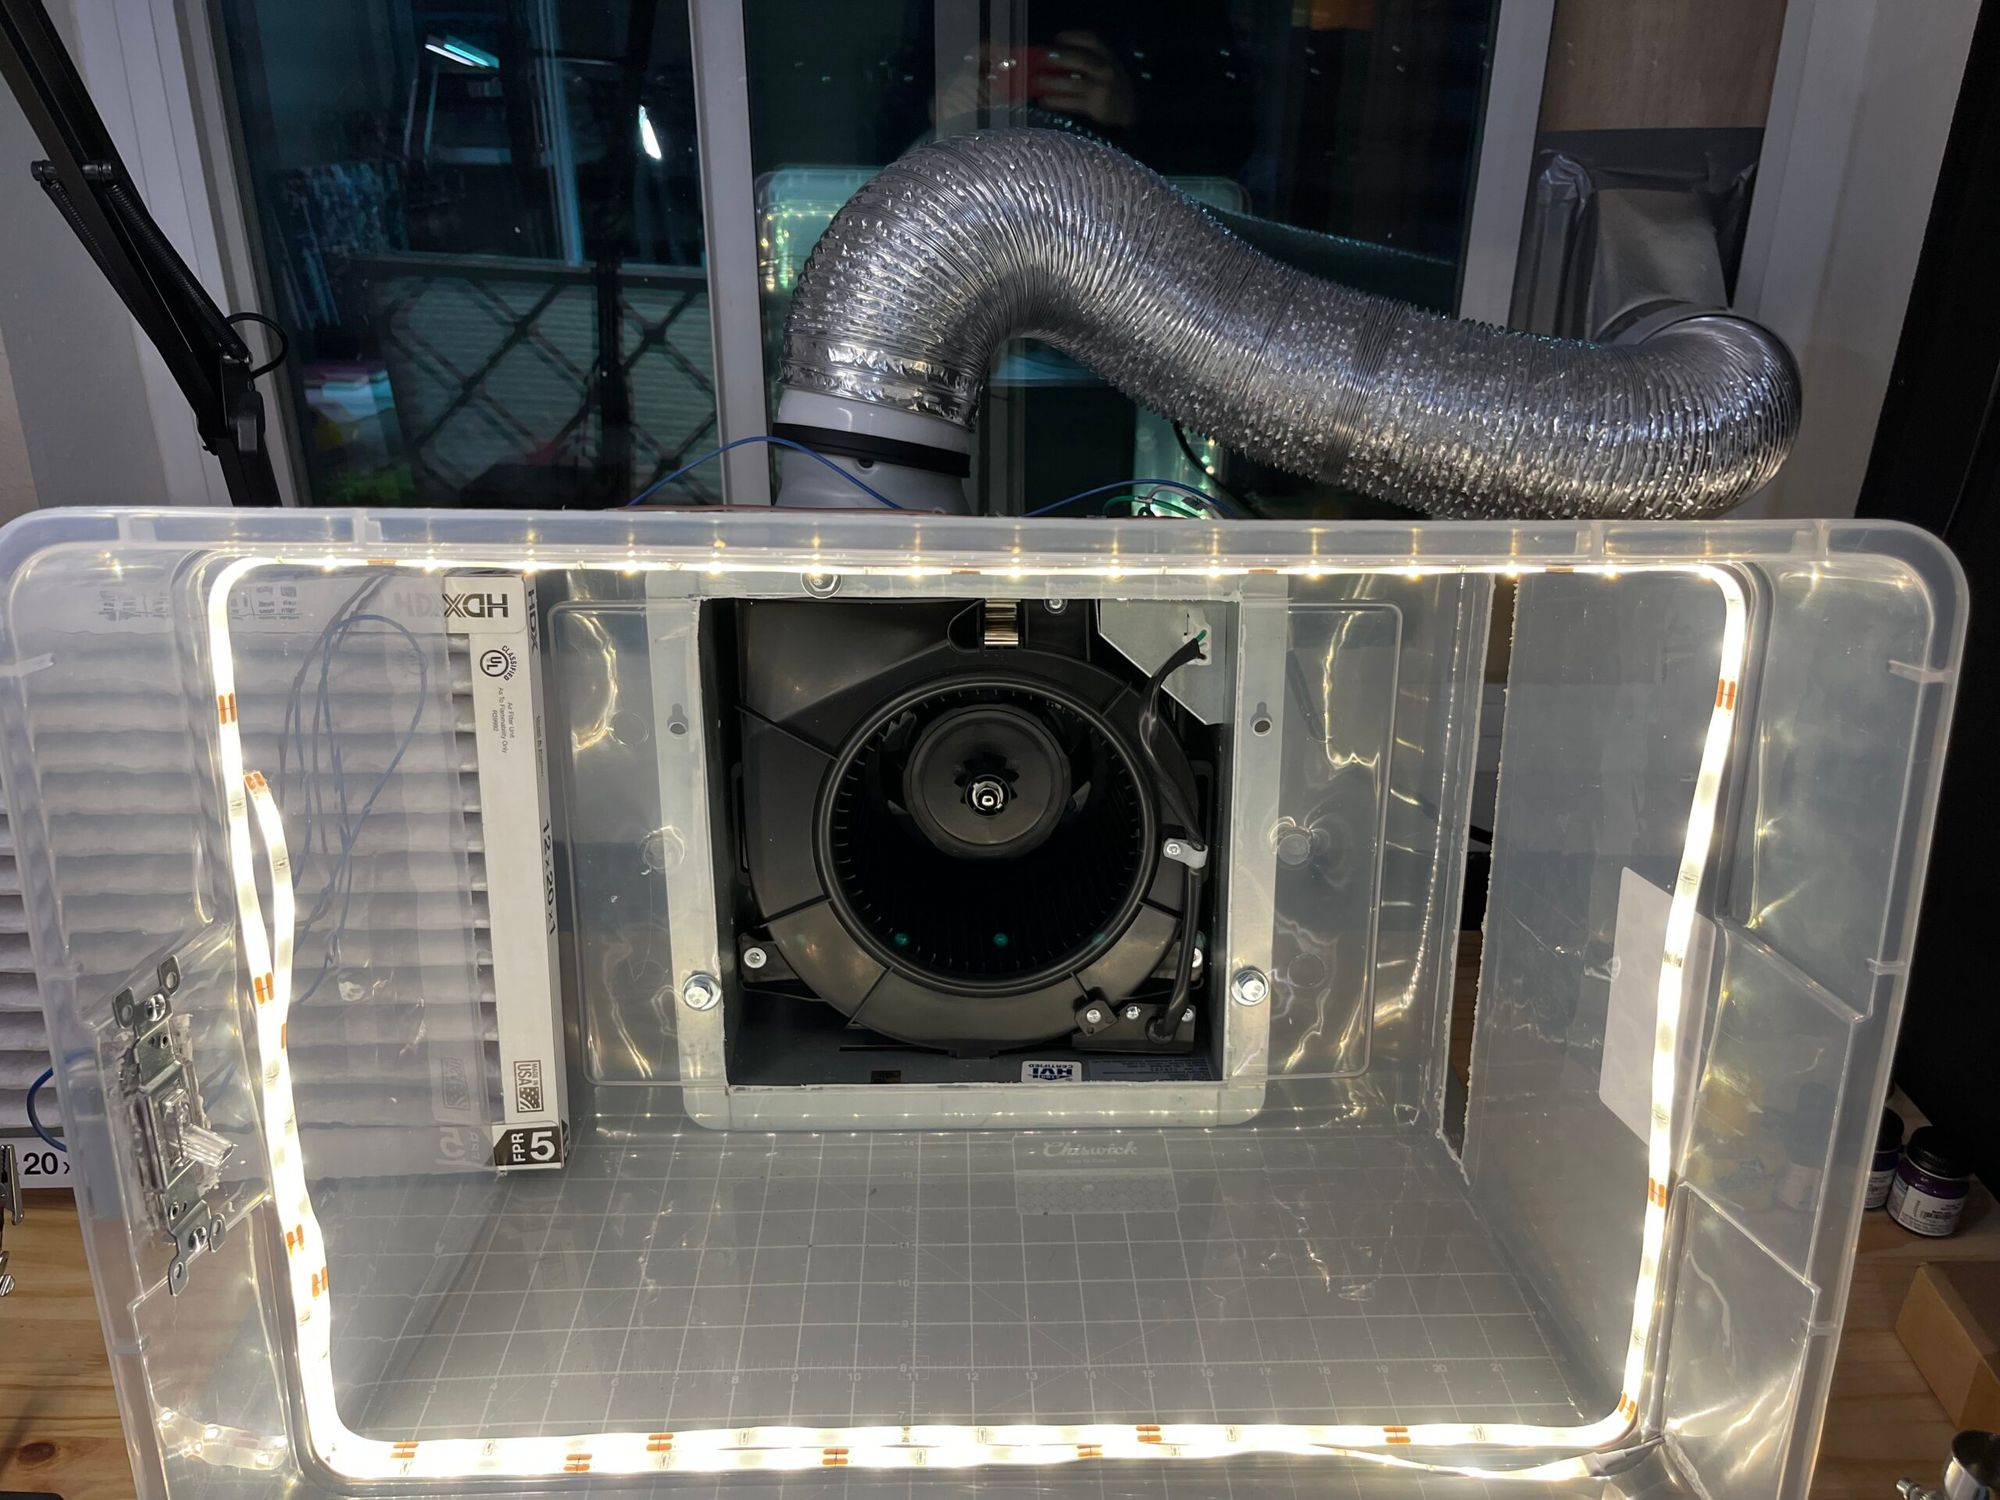
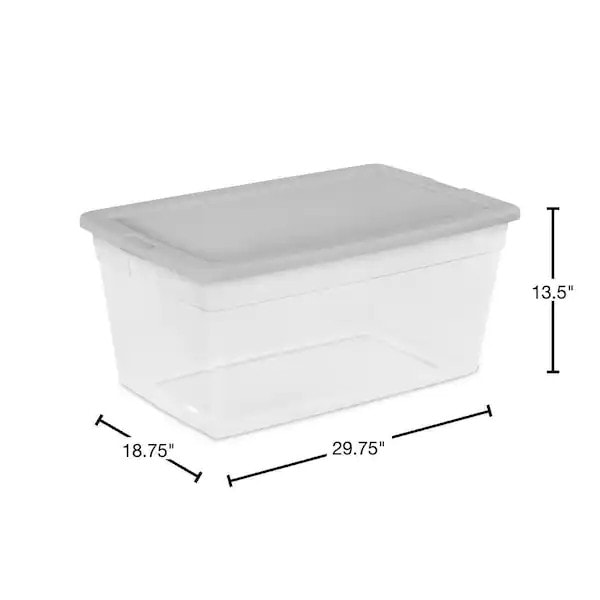
A clear storage box
The sizing here is quite important, because you want to cut rectangular slots in the base, which can house an HVAC filter.
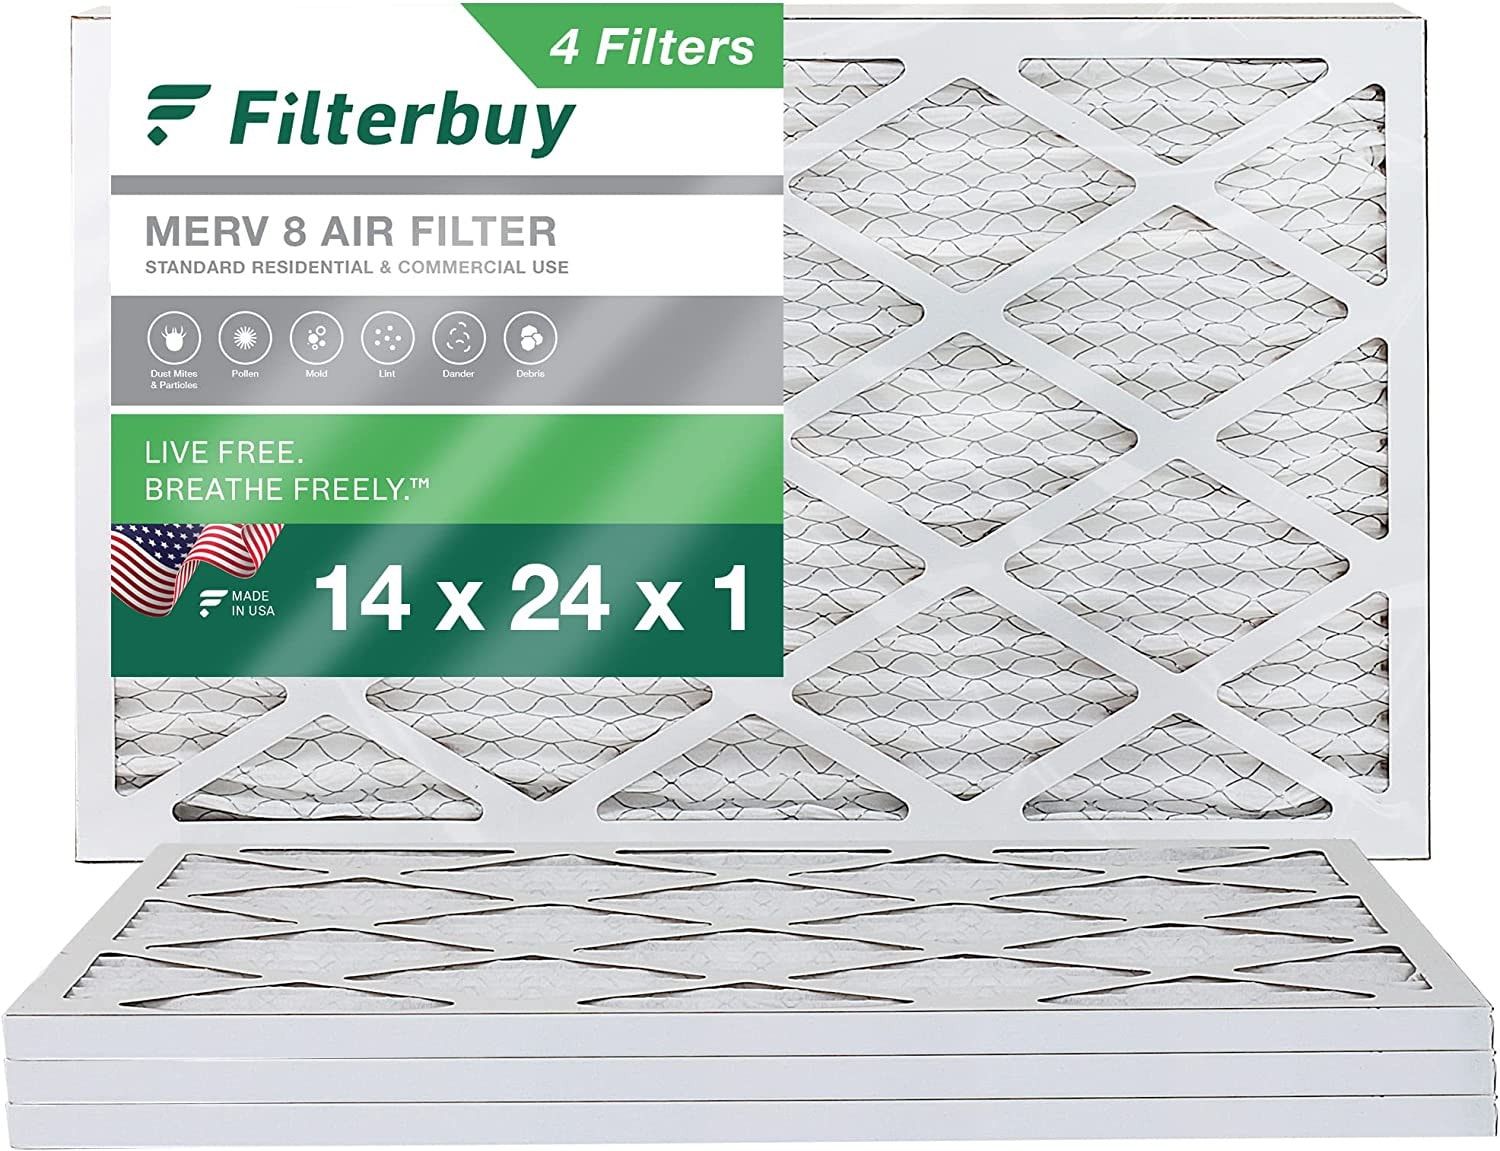
HVAC filter
The size of this is obviously important. Given the above image, the one below would work quite well, since the length of the box tapers towards the bottom which would end up being around 24 inches.
Switch + wires
You obviously want to be able to turn the extractor fan on and off, so a simple light switch with two terminals will suffice. You are going to end up wiring this to the live wire (black wire) on the extractor fan.
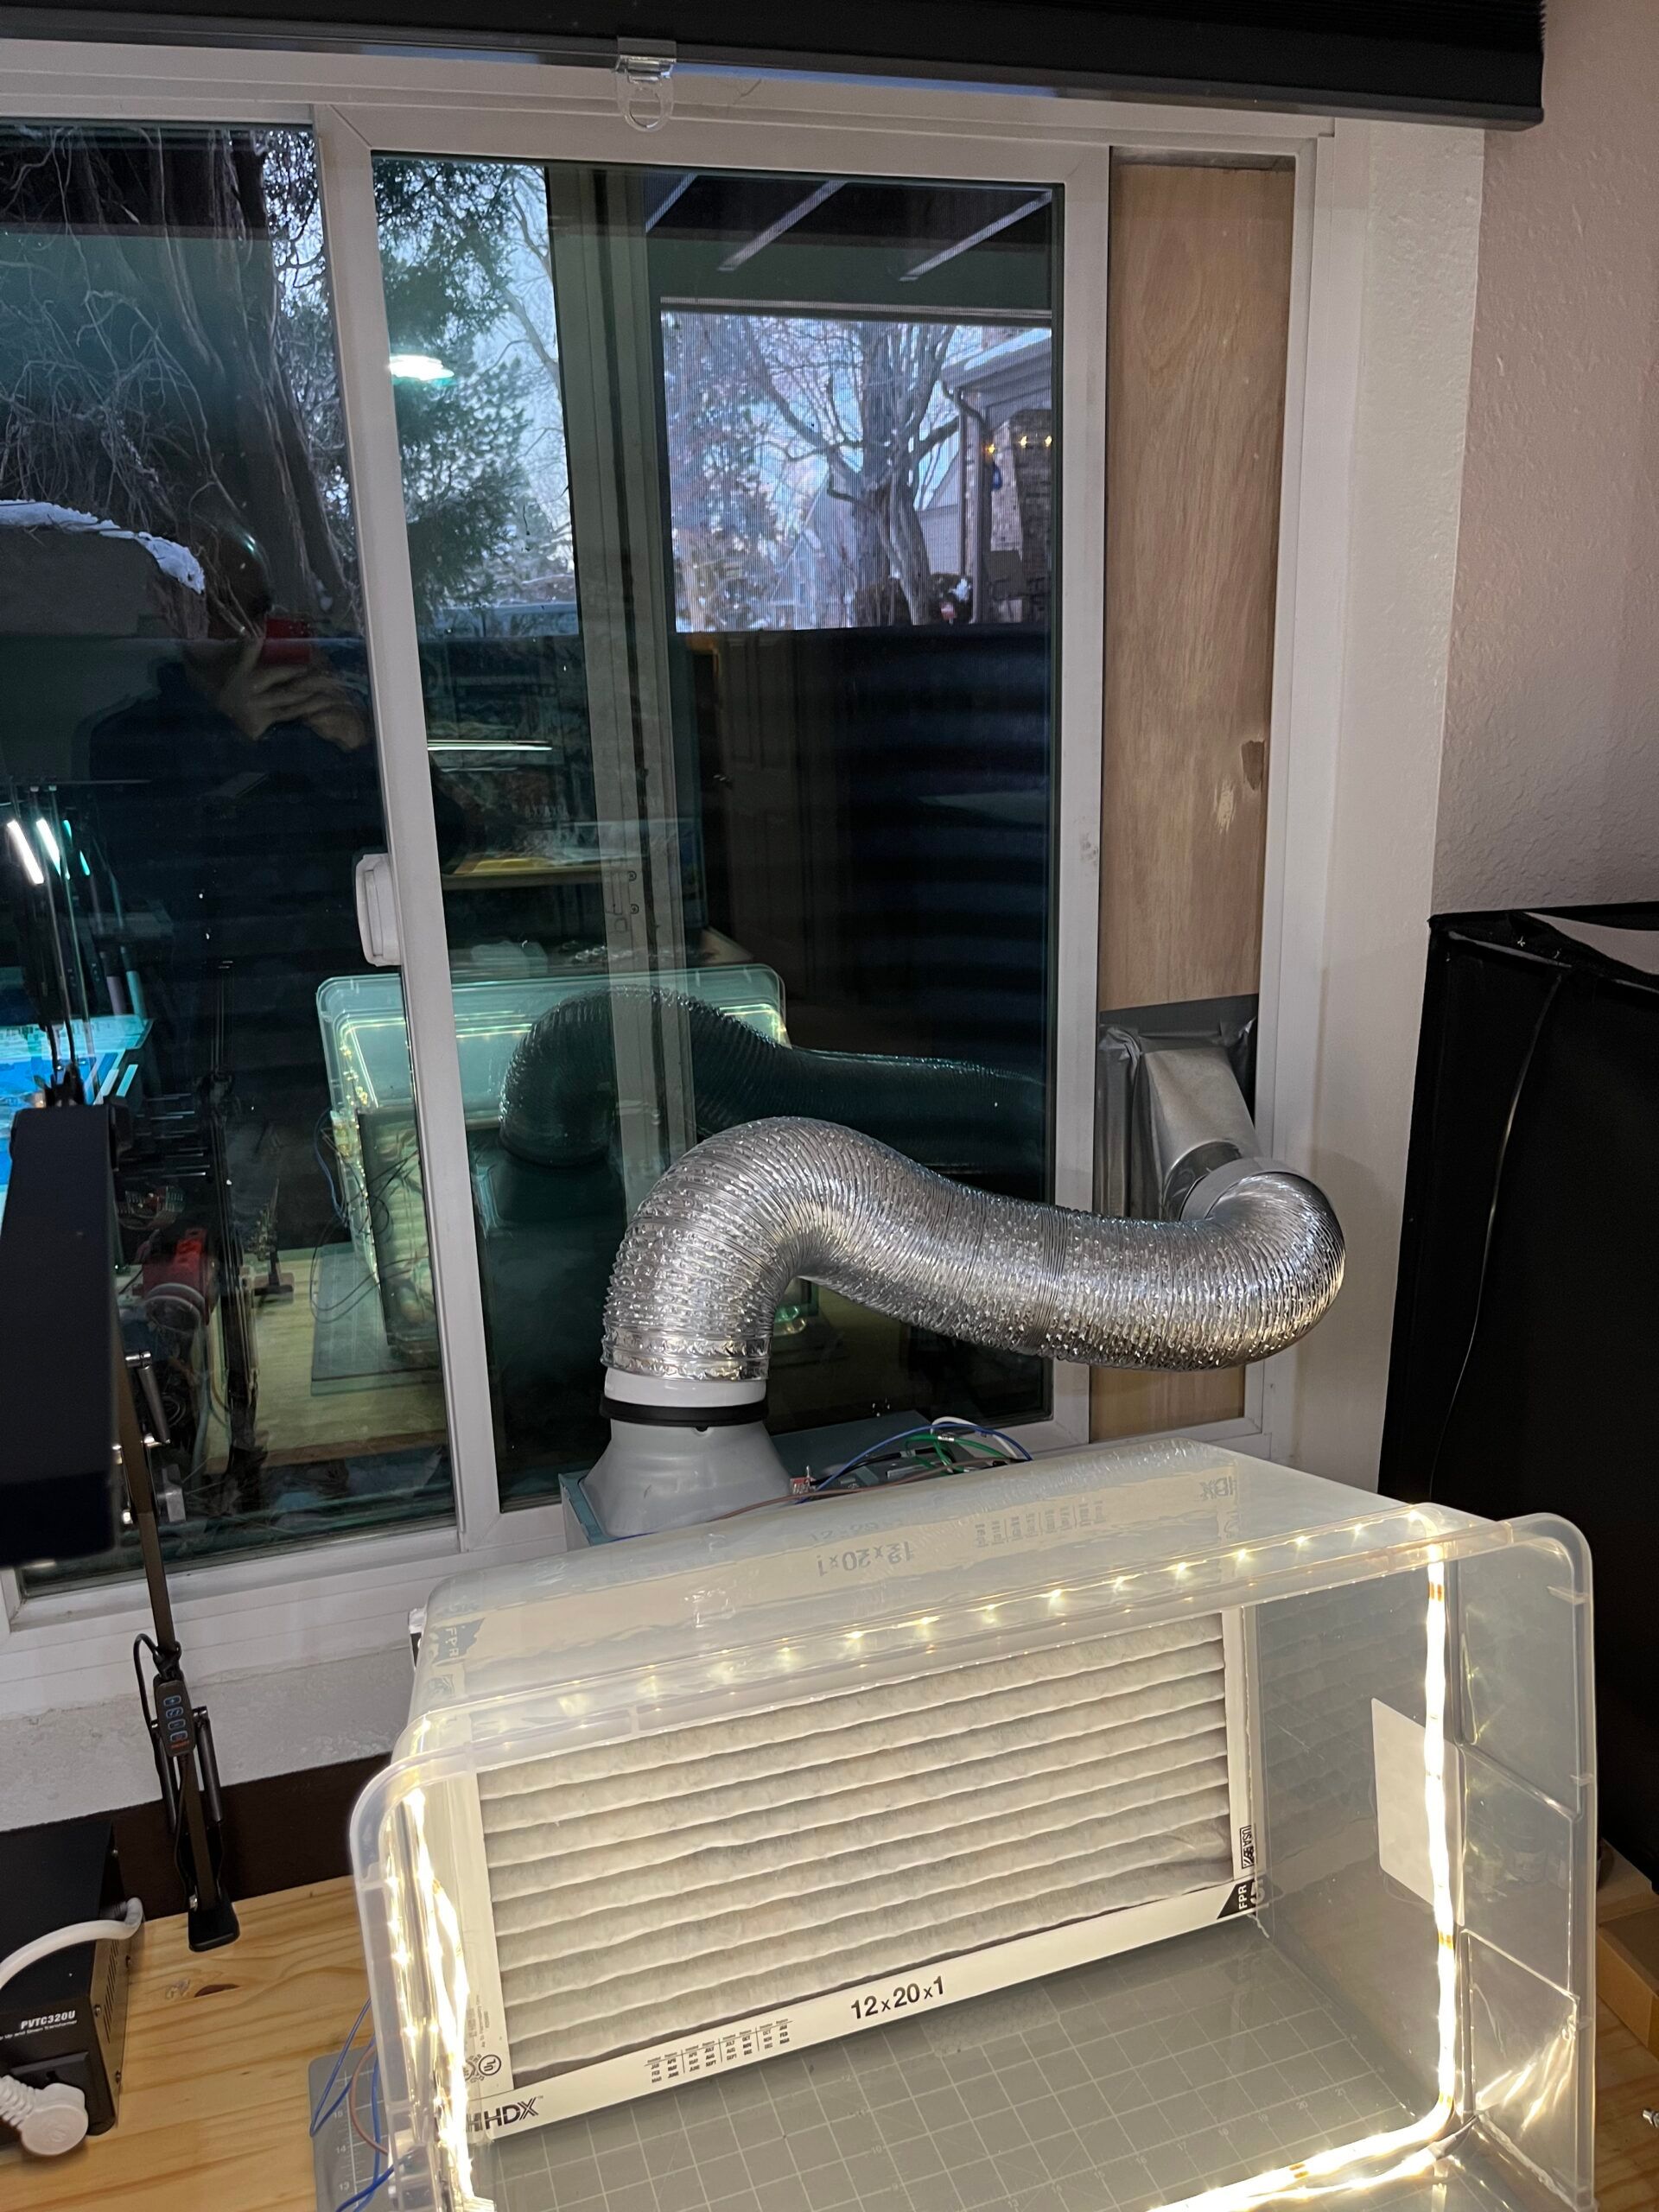
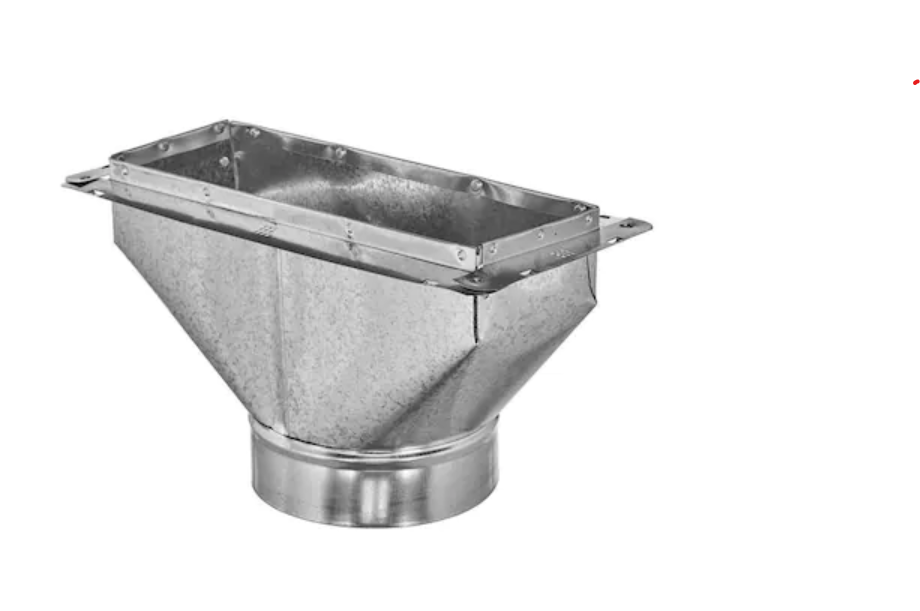
Duct vent + duct piping + duct tape
The Extractor fan I ended up using, has a 4inch outlet pipe. thankfully, most duct pipes come in this exact size, and along with duct vents. See image below:
I also got some duct tape because when I end up mounting the vent into a piece of wood that will end up fitting inside my window frame, I want to make sure that it is relatively sealed and no (cold) air from outside can get in while my HVAC is trying to keep the room warm.
How to assemble
Assembling the booth is relatively simple, as it basically requires you to attach the housing of the extractor fan to the base of the storage box. First you cut out a hole in the bottom, and then you drill holes to line up with the holes on the extractor housing.
A note on cutting plastic: I use a Dremel with a cutting bit to almost circular-saw through the plastic, and then clean up the edges using a file and/or some coarse sand paper..
A note on drilling holes in plastic: Drill bits will almost always rip or crack the plastic, and so using a variable size drill-bit such as the one below, will prevent that. I can recommend these enough:

You then want to cut some slots into the side of the booth so you can slide in your HVAC filter.
And then its a simple matter of wiring up the extractor unit to your switch, and firing it up.
Bonus points if you mount in some LED lights to illuminate whatever it is you are spraying.