Blender + KitOps + Decal Machine > export to Unreal Engine 5
Preparing for export
The first step is to get the mesh ready for export. If you are using tools such as KitOps or HardOps then I find it useful to save the blender file as a copy so that we can apply most of the modifiers, bake any base textures we may have and also convert many of our KitOps inserts into meshes.
While this may appear as a very tedious process, it gets a lot faster over time, and there's some nice tools we can use to make the process really easy.
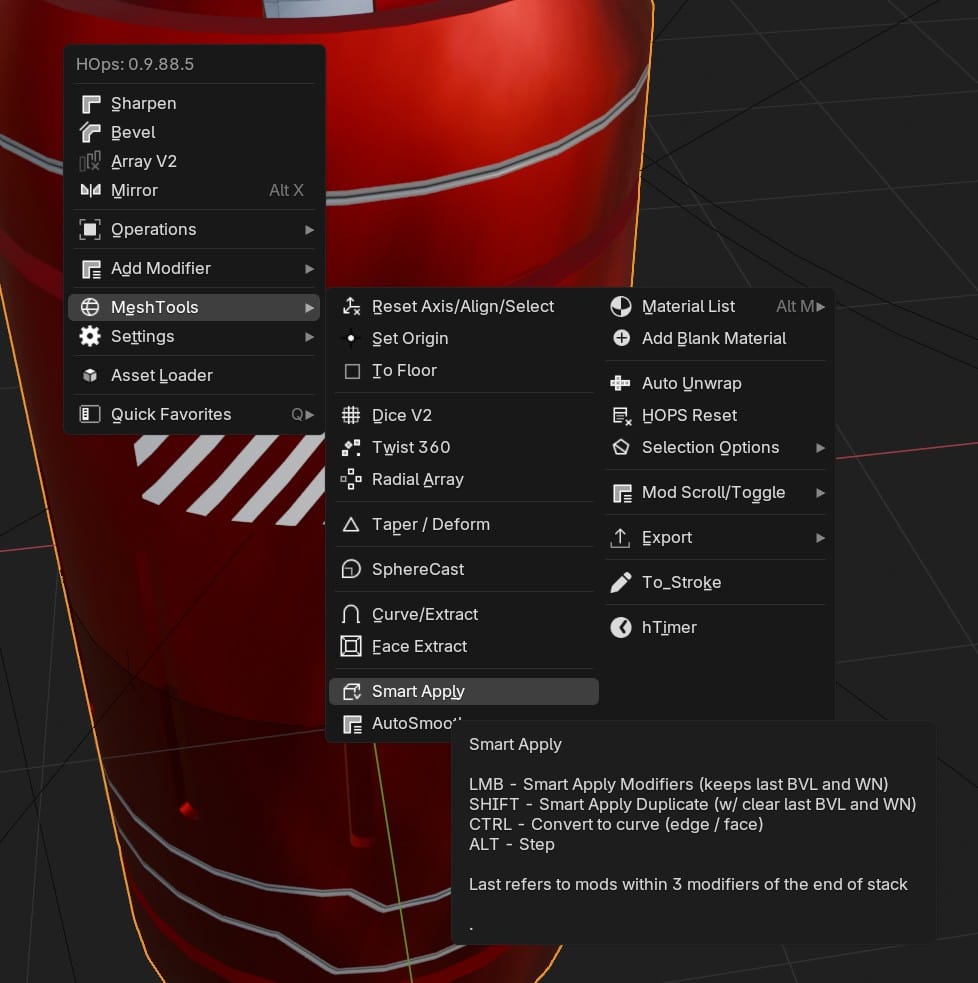
HardOps: Smart apply and autosmooth
HardOps applies modifiers in a really smart way as you are working with various cutters. I find it useful to therefore smart-apply the modifiers and do a final round of autosmooth afterwards to a single static mesh that we can then bake any textures if we need.
KitOps: convert inserts to mesh
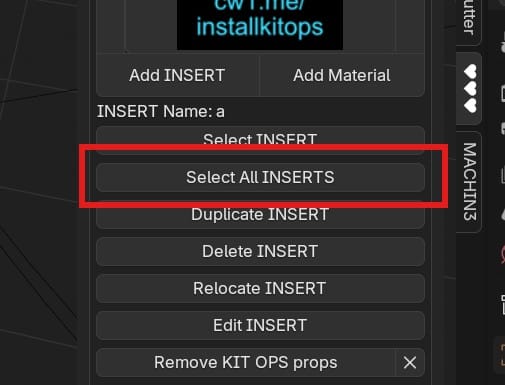
With nothing selected, head on over to the KitOps panel and then "select all inserts".
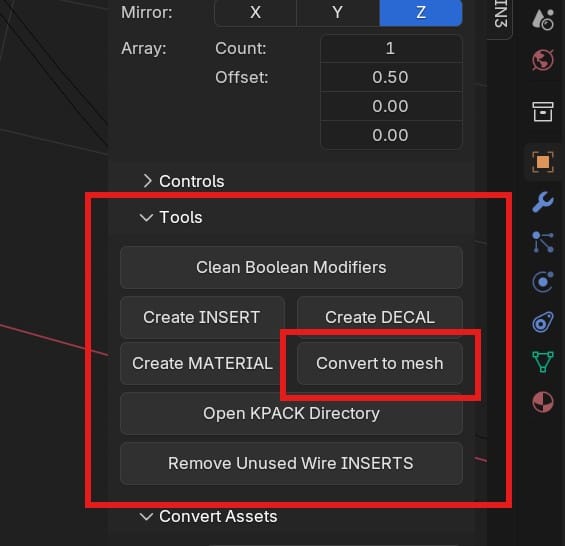
Convert the inserts to meshes
Join the meshes into a single mesh object using the blender join command:
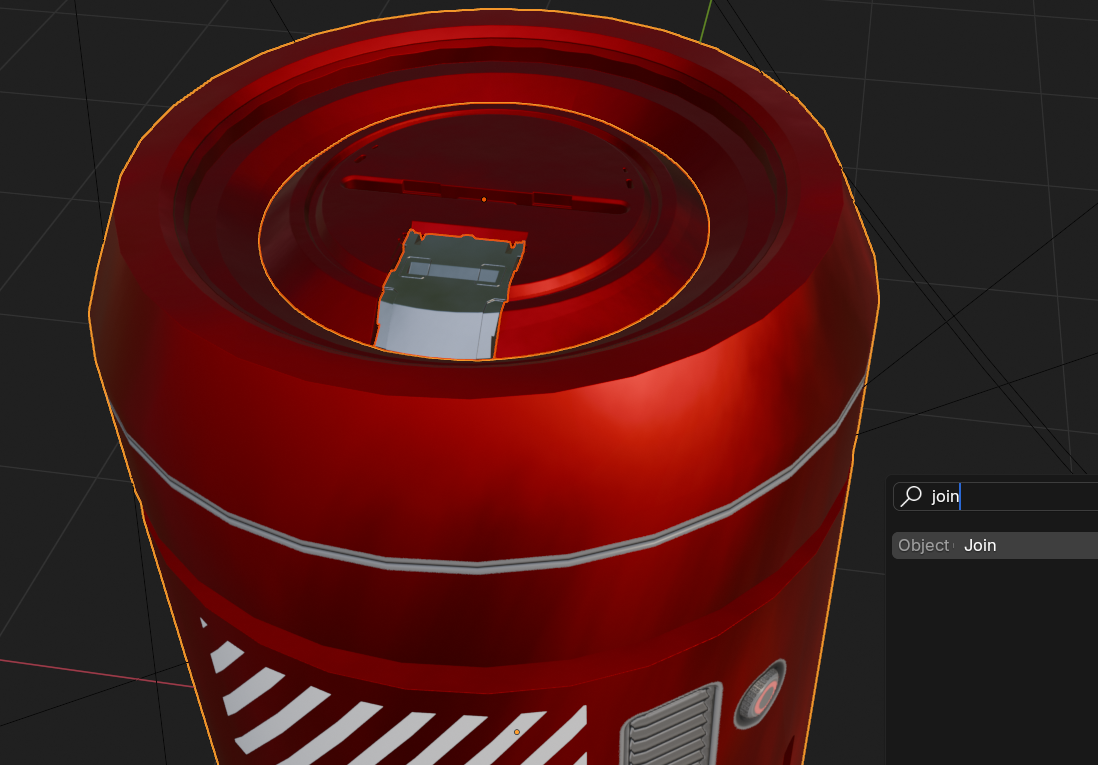
I find it useful to select all the inserts and then select the main mesh so that the main mesh is the target which the inserts will join onto, instead of the other way around.
Decal machine: prepare for export
For this we will need to use the atlas functionality in decal machine. Click the "Use atlas" button.
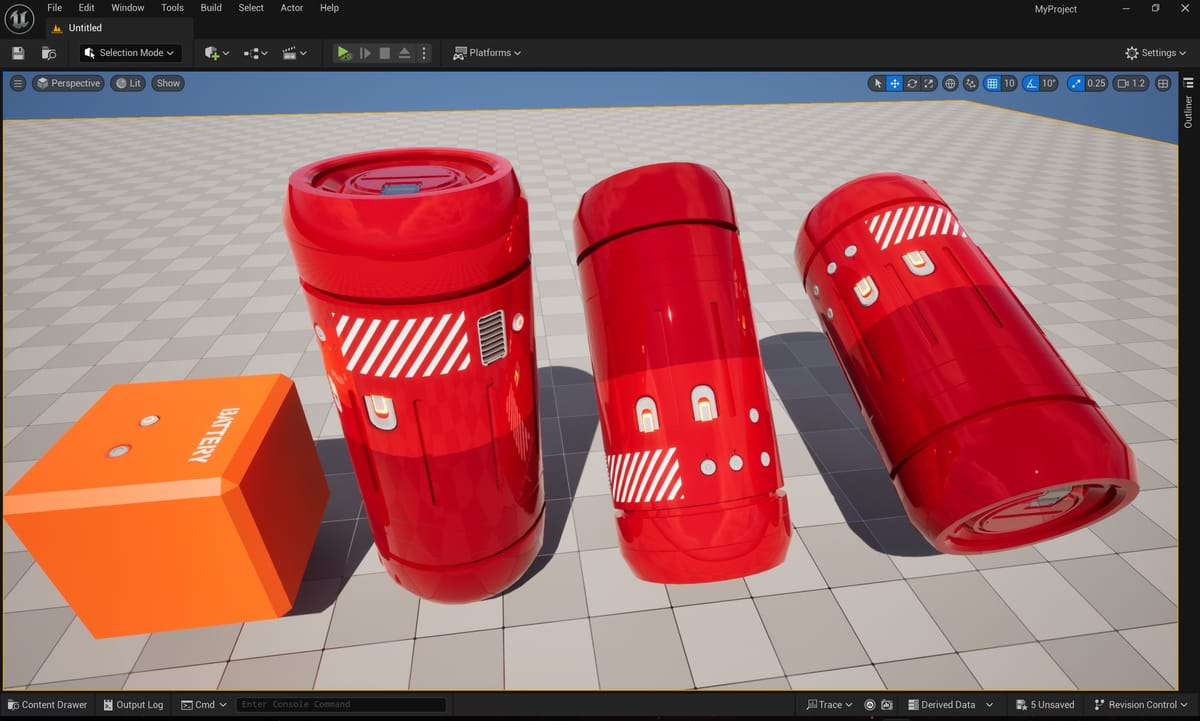
You will notice that all your decals will appear with a gray material with their auto-matched bevel/trim colors seemingly no longer matching the base material. DO NOT WORRY, this is purely a preview material set that Decal Machine has set up within Blender. When we export to unreal engine, we use a shader that will fix this with opacity masks making the decals blend in perfectly (you can see this in the very first screenshot of this post.).
Next, with nothing selected, we can press the "Join atlased decals" button which will group all the decals from the same atlas together. Here you can see that selecting one of the decals from an atlas now also selects its siblings. This will make things easier for us in UE.
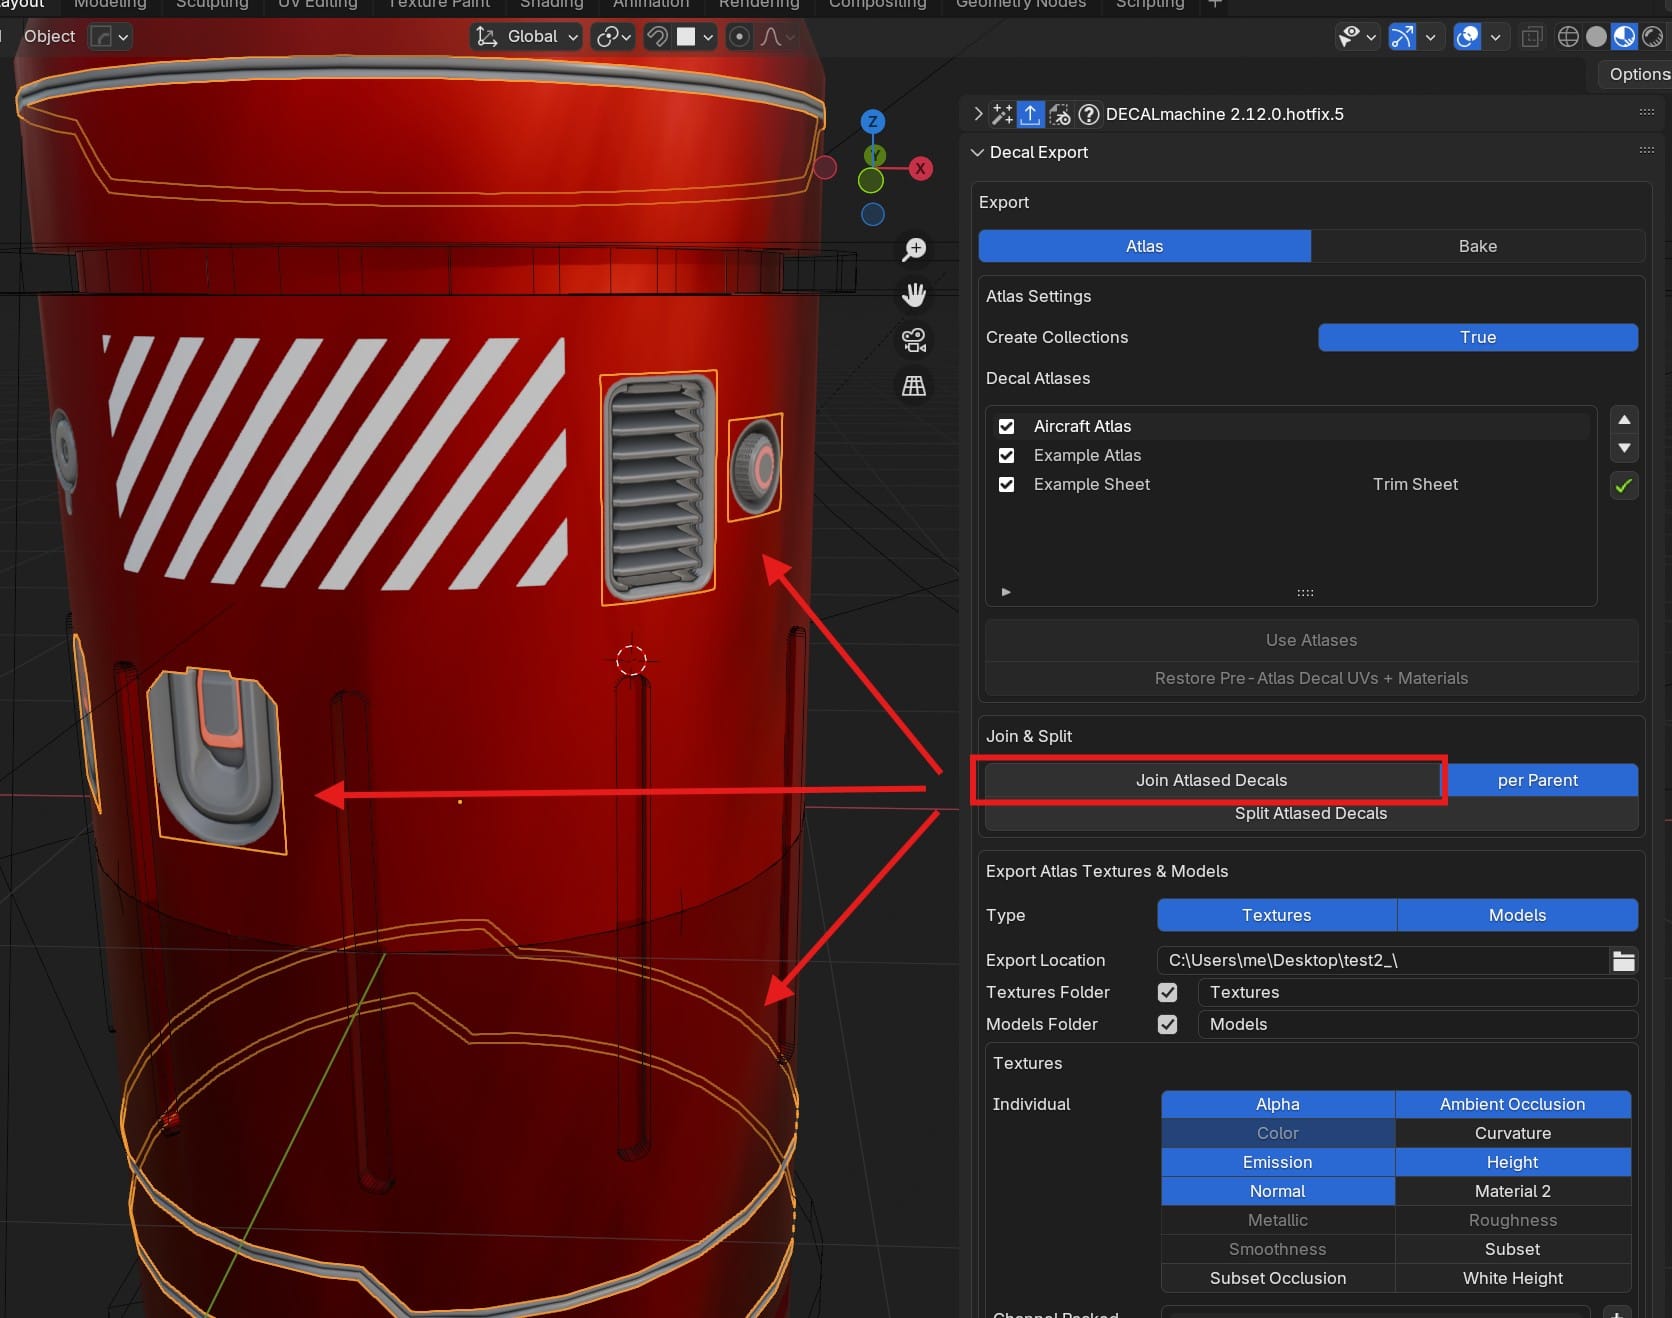
Next, we need to tell DecalMachine what we want to export. For the shader tech in UnrealEngine, make sure your settings match these exactly (including the channels):
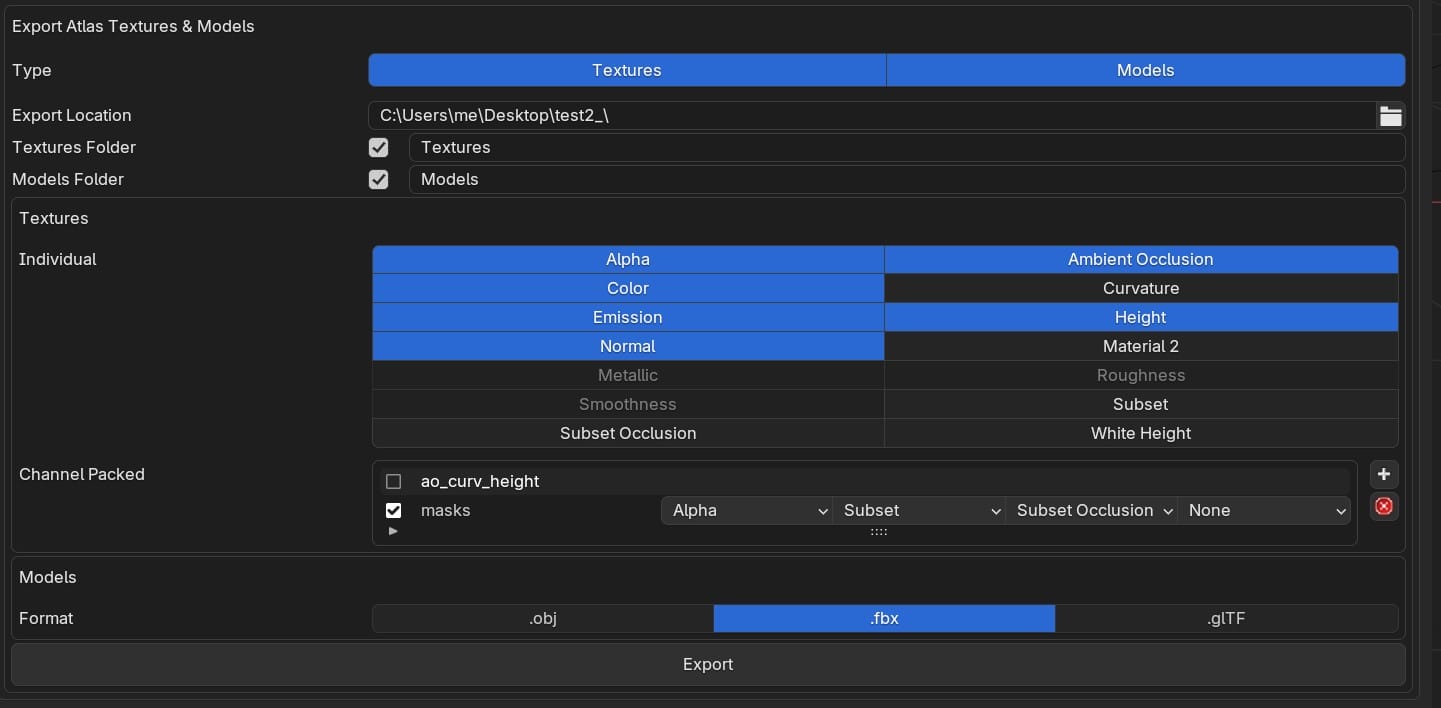
I tend to set my export location to the folder where I am storing my blender file for the model.
Now we can export! To do this, I use the ALT + SHIFT + Z to hide the overlays (which importantly, will also hide KitOps jigs + HardOps cutter gizmos + any light and camera gizmos on your scene. Once this is done, you can use the block selection tool in Blender to select essentially everything else that is left visible.
Note that its not important to parent or join the decals to the main mesh, we can simply combine meshes when we import in unreal:
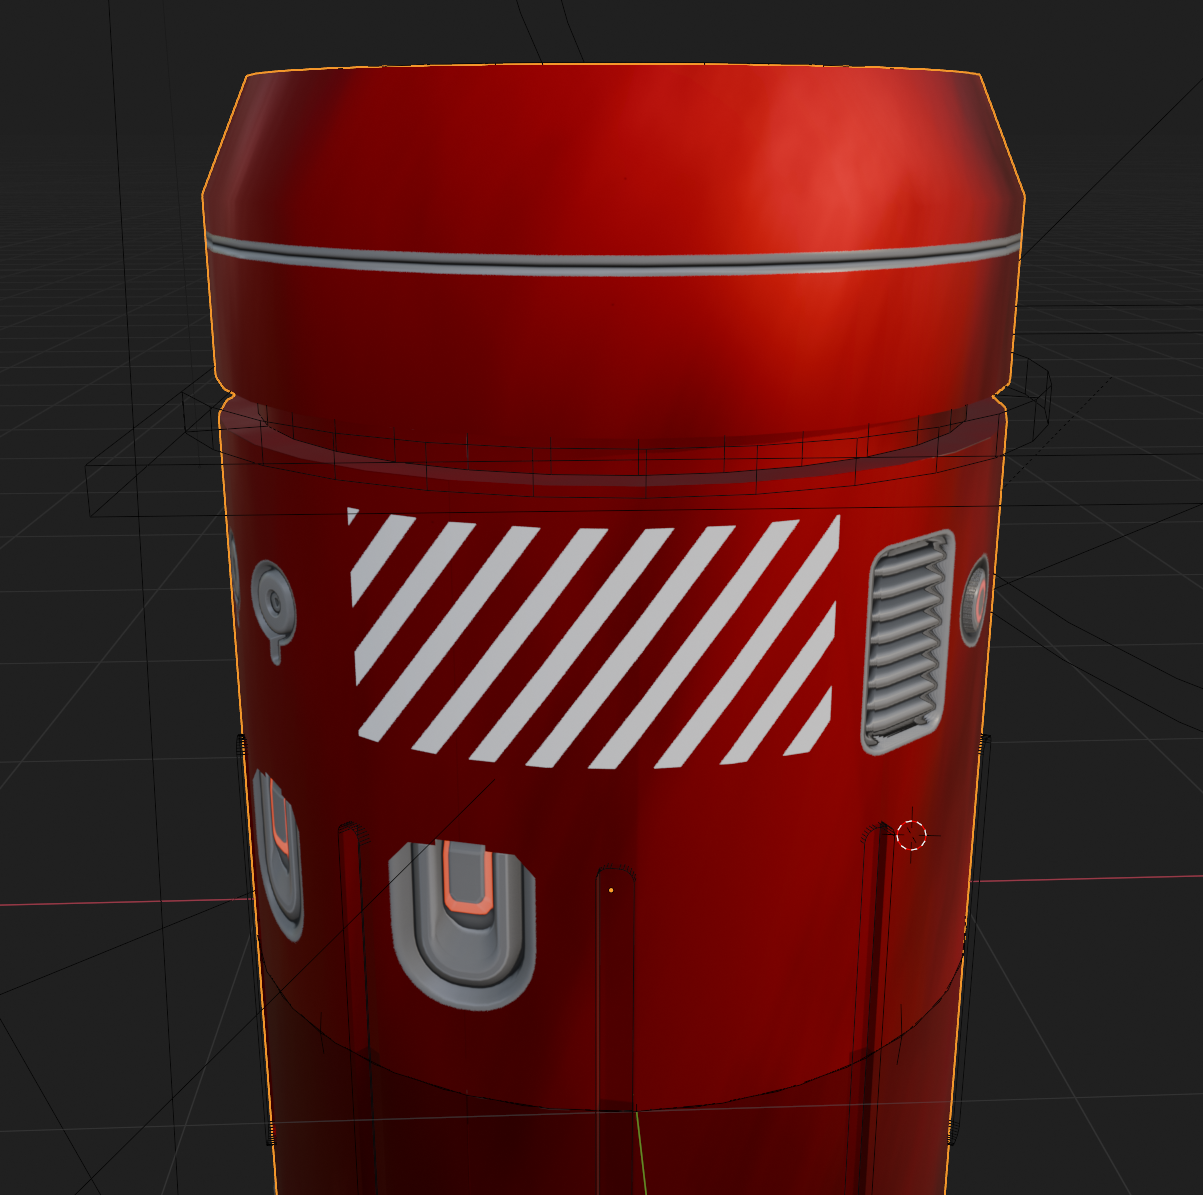
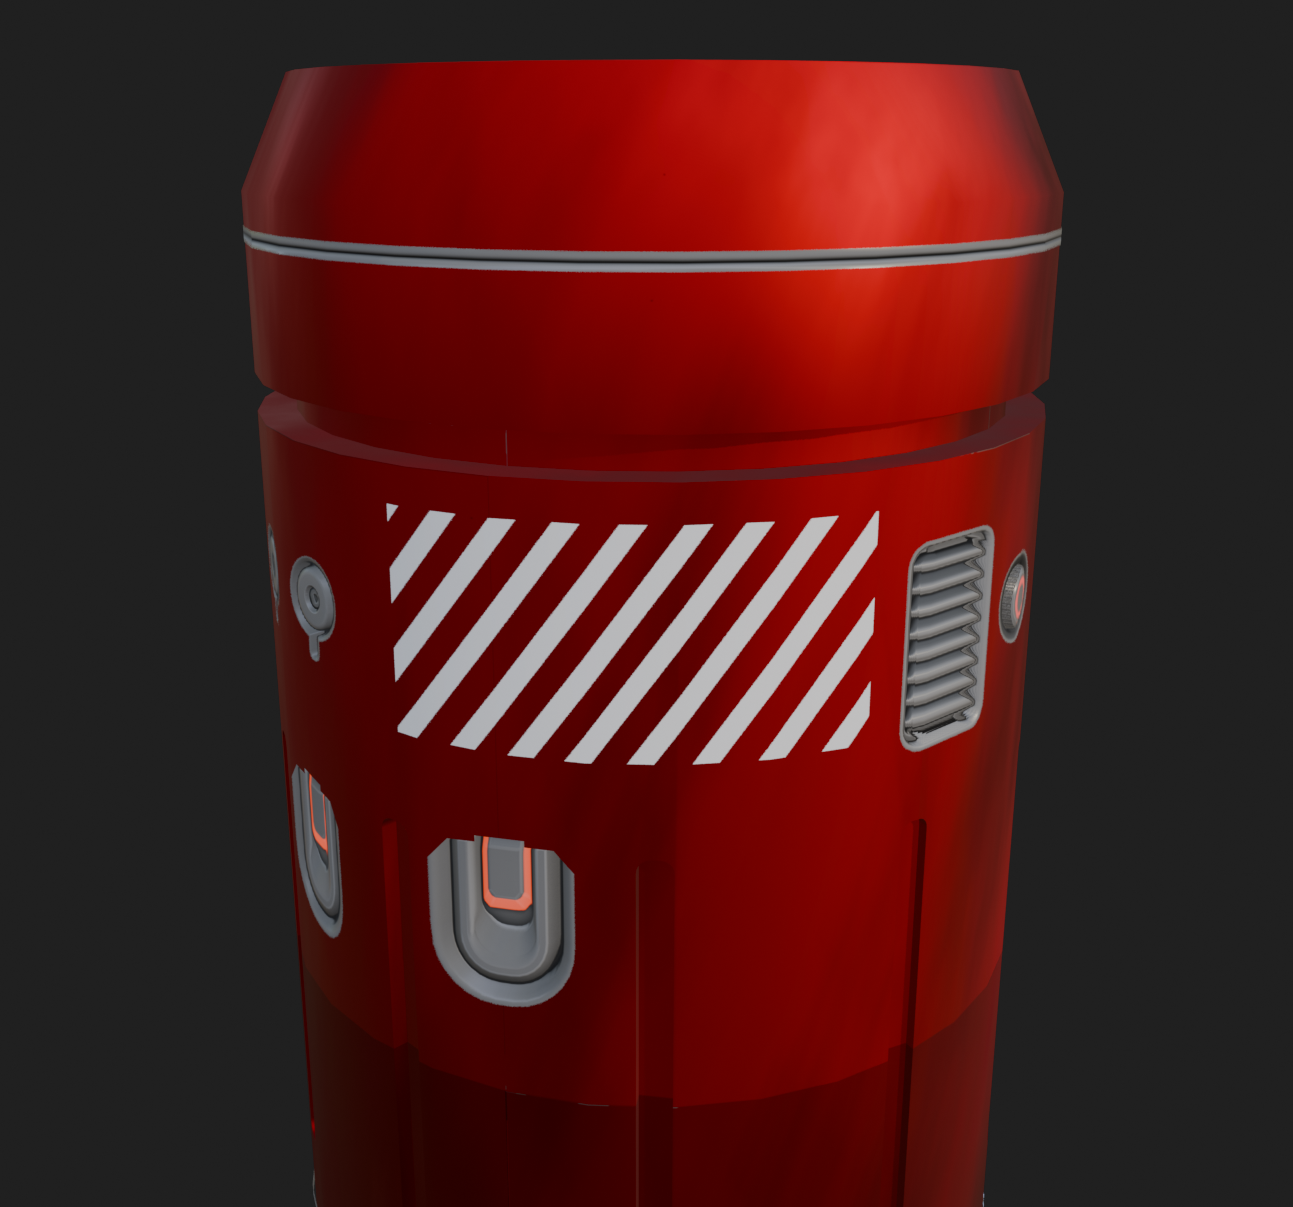
Before and after gizmos are hidden (notice how the HardOps cutters also disappear )
Time to export!
With everything visible that you want to export, box select everything, go back to the DecalMachine panel and press the export button (with models and textures selected). In the FBX settings box, make sure to enable "selected objects".This is important because our decals were only parented to the main mesh, but do not actually exist with the main mesh, which is why we did the above step to select the visible stuff:
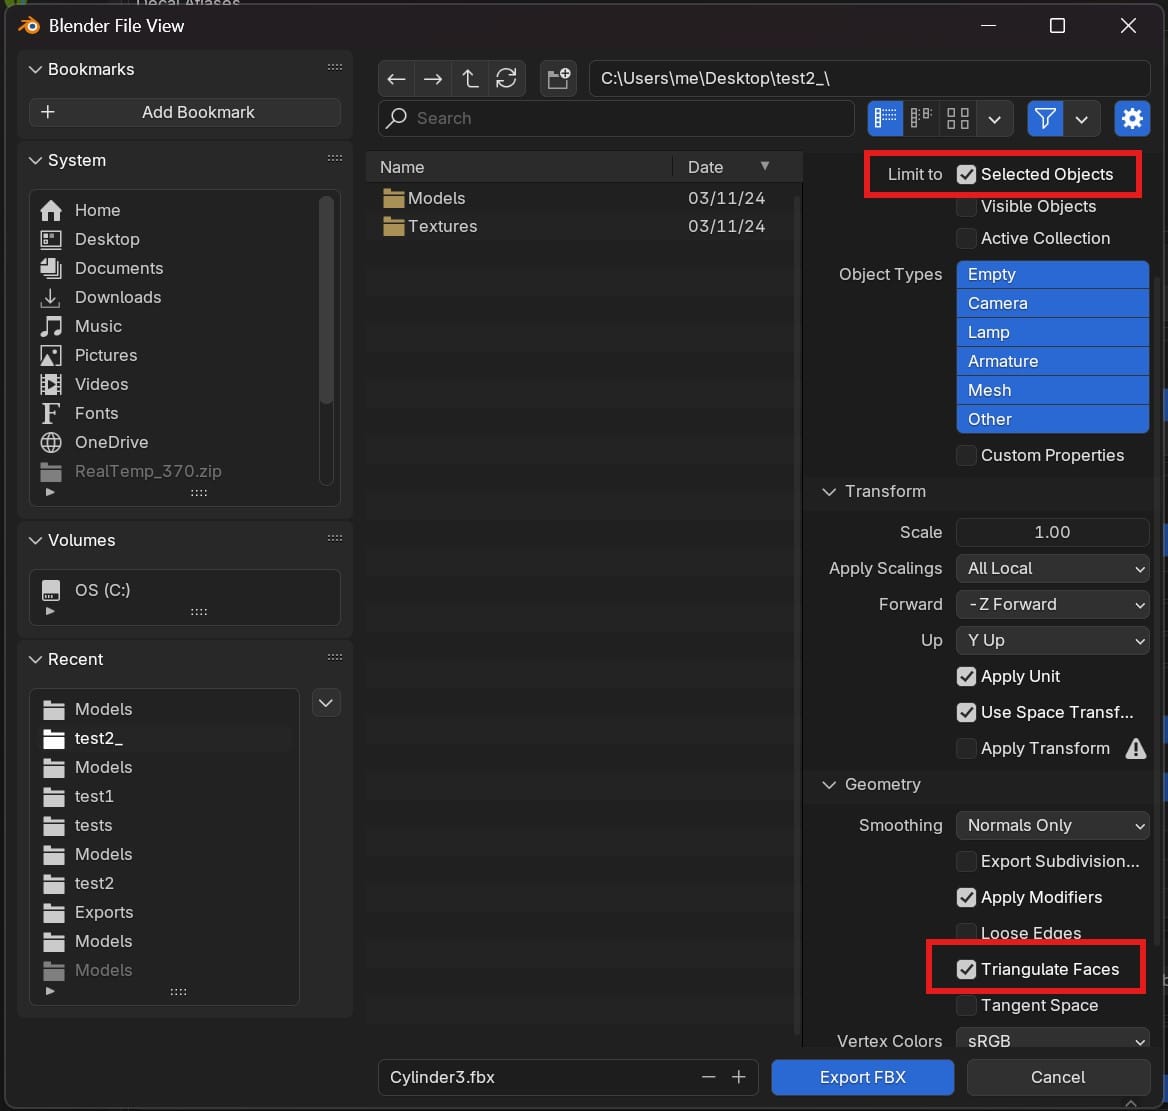
Game engines hate quads, so make sure to enable Triangulate Faces.
Time for unreal engine
At this point we should now have a folder with a nested textures folder looks something like this:
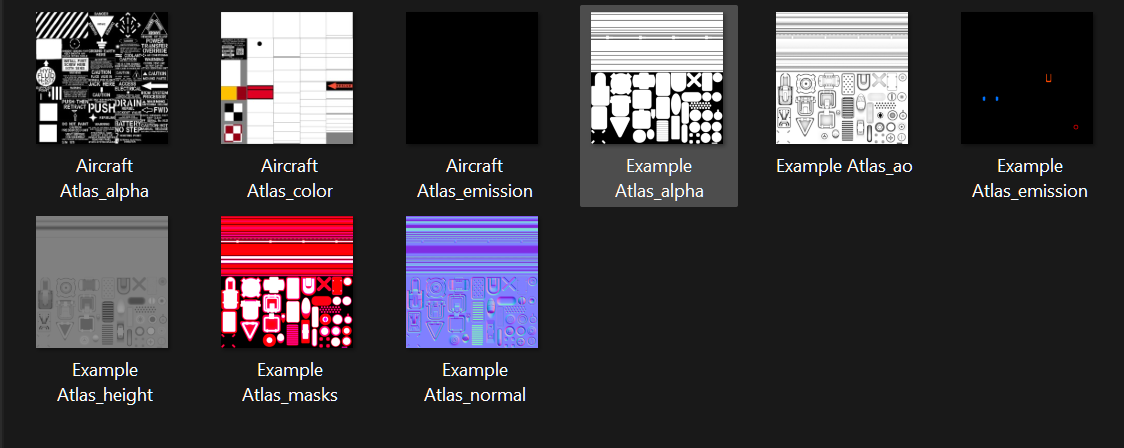
The shader set which simplifies Parallax occlusion mapping
Unreal engine has a special set of material nodes that will allow the above texture files to render with Parallax occlusion mapping. This is the shader tech which makes the 3D decals appear "3D" regardless of the angle that you view them on your model (this is why the height and normal maps we exported are so important).
There is a premade set of shaders which you can grab here for free:
Note that even though it says Unreal Engine 4, it also works perfectly in UE 5
Follow the set-up instructions on that page (but its essentially copying the 3 uasset files into the content directory of your project and restarting the editor).
It will look like this:
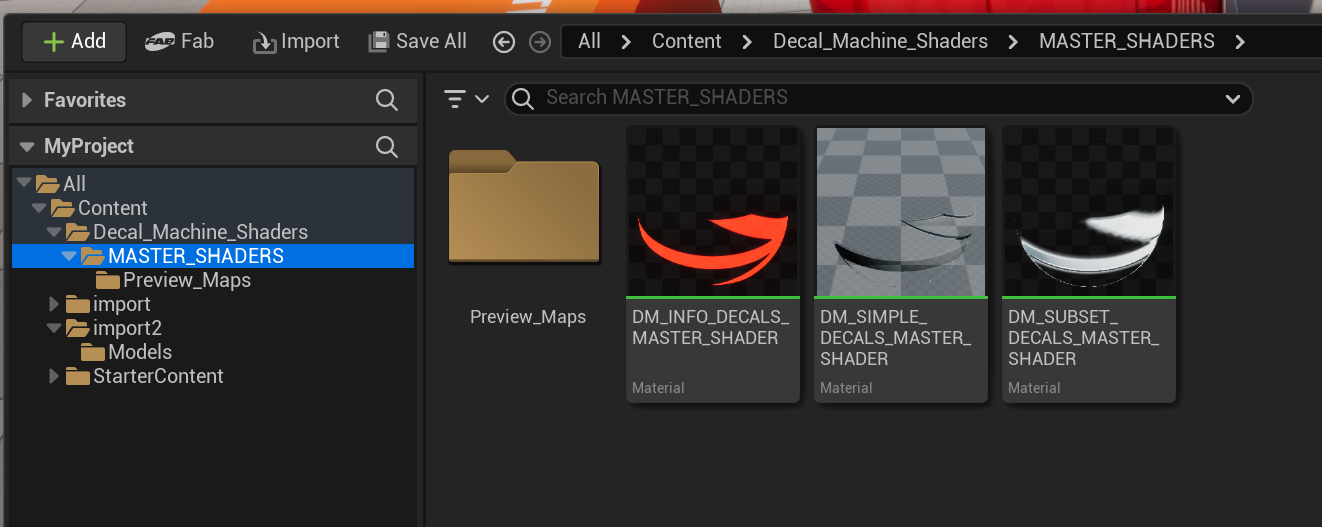
Once that is set up, drag the model and textures folders into the content browser:
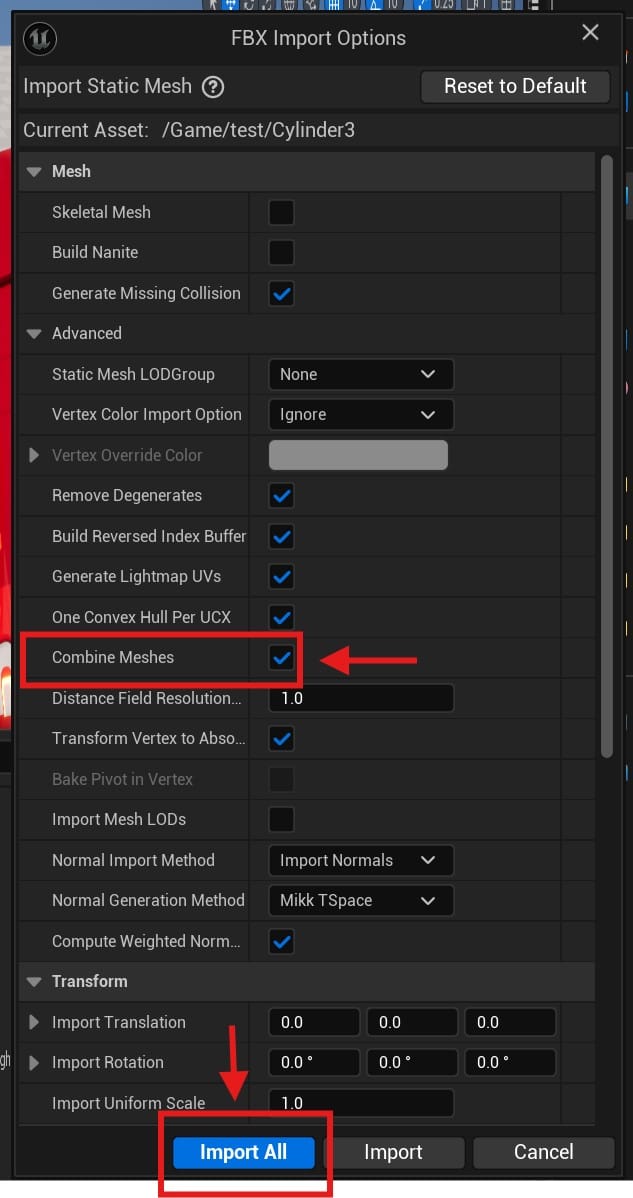
The "combine meshes" checkbox here in combination with "Import All" will give us a single static mesh that we can import.
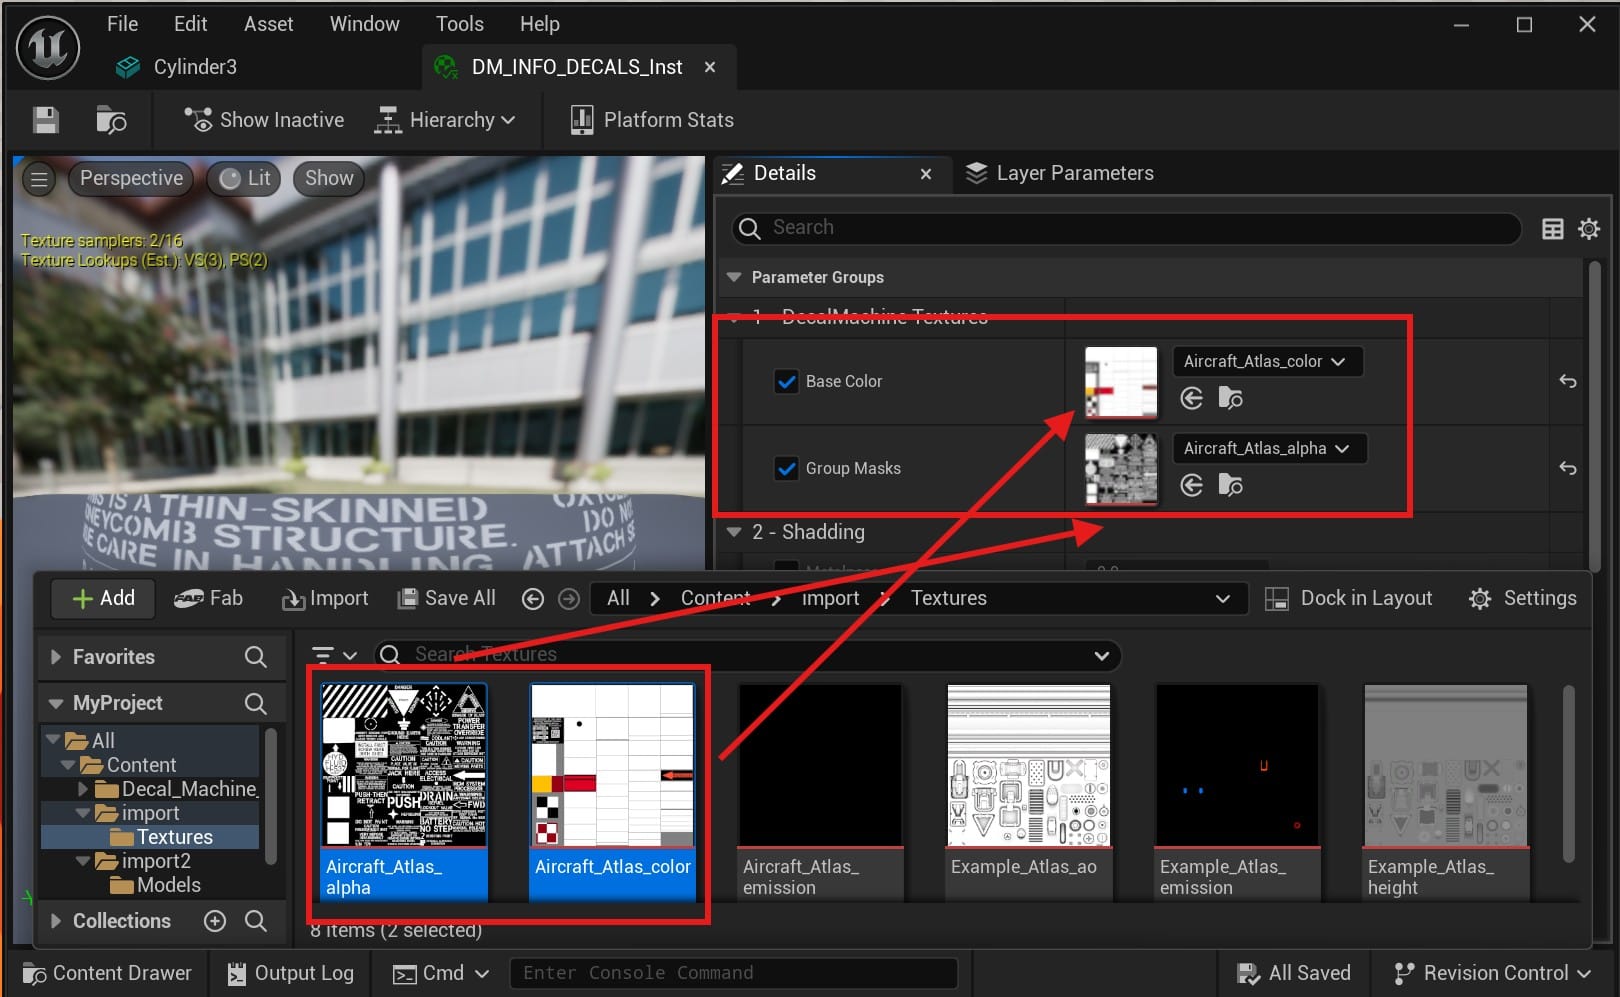
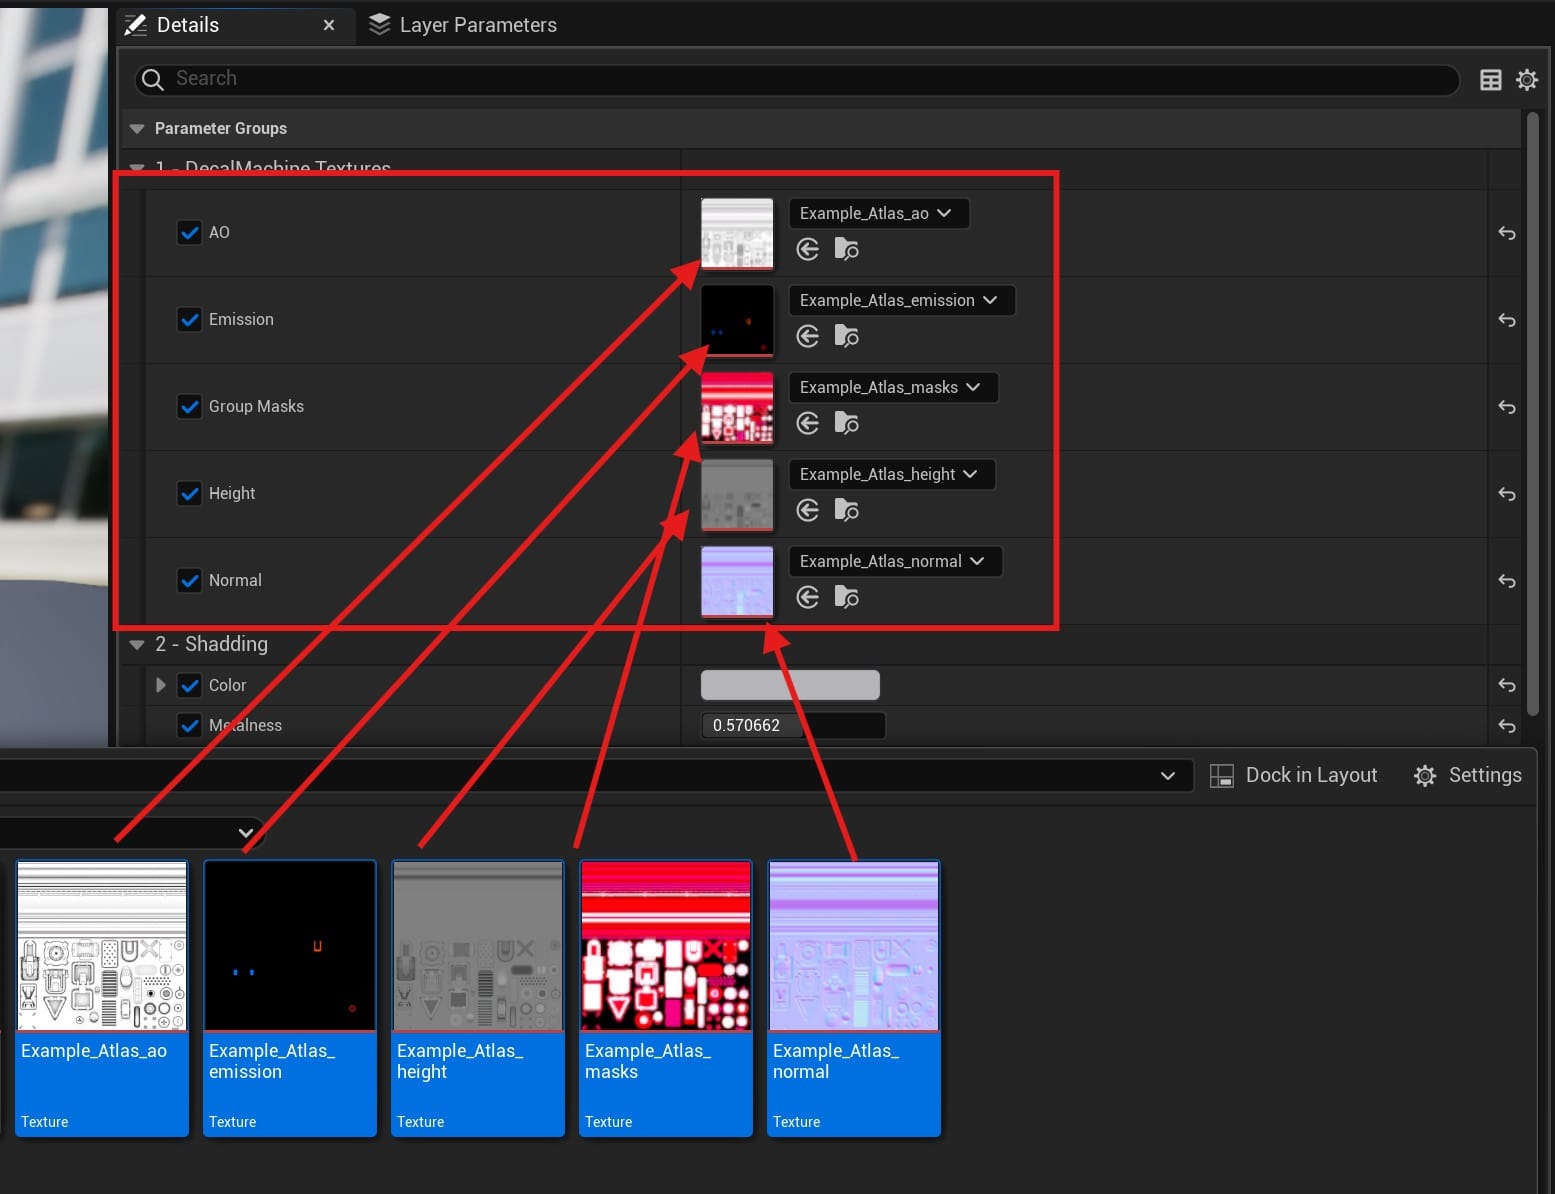
Next, we need to set-up the simple and sub-set material instances. Open both of these up:
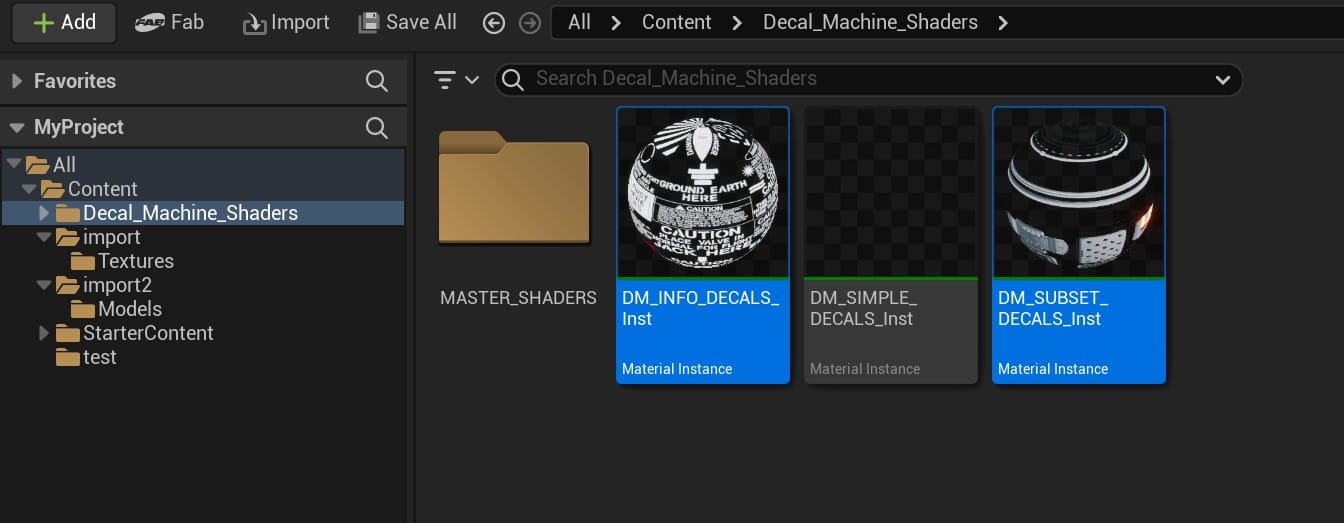
And then drag the various textures into each of the parameters as shown below:
Lastly, we need to open up our actual Static mesh, and then assign the material instances to the material slots:
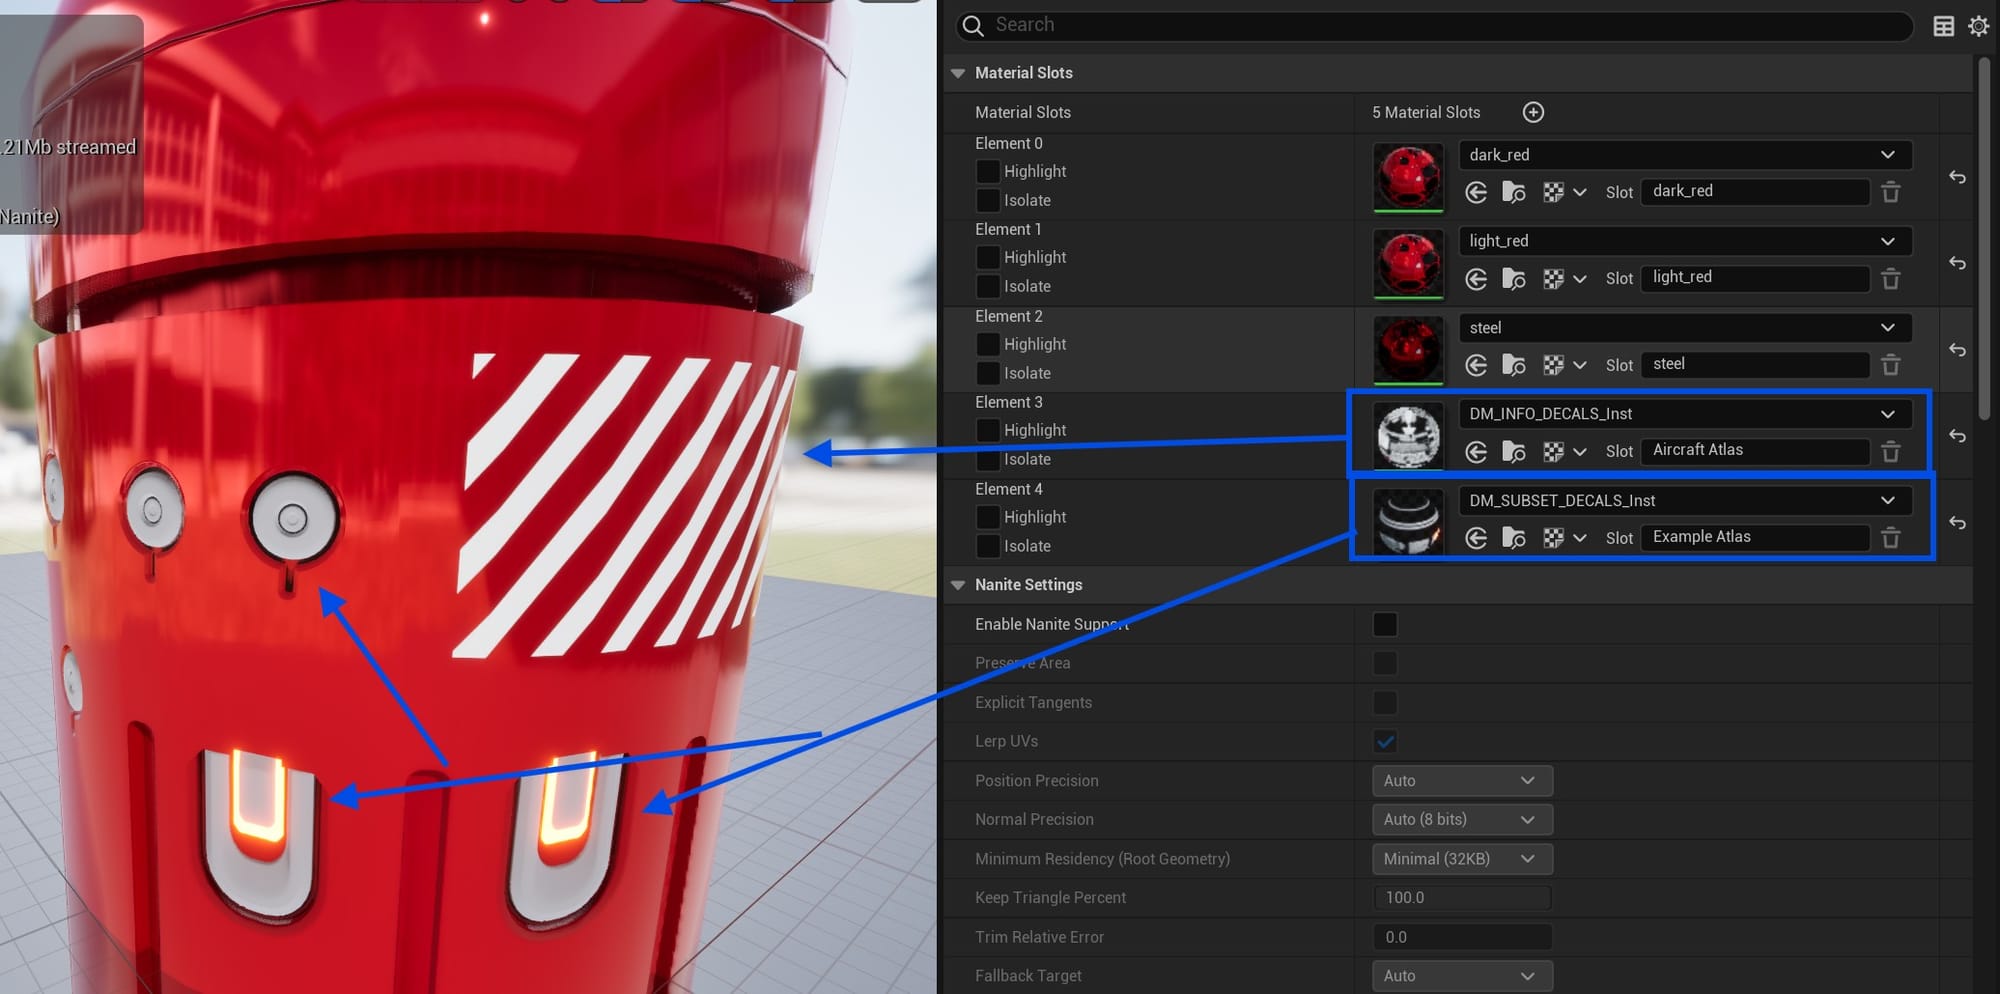
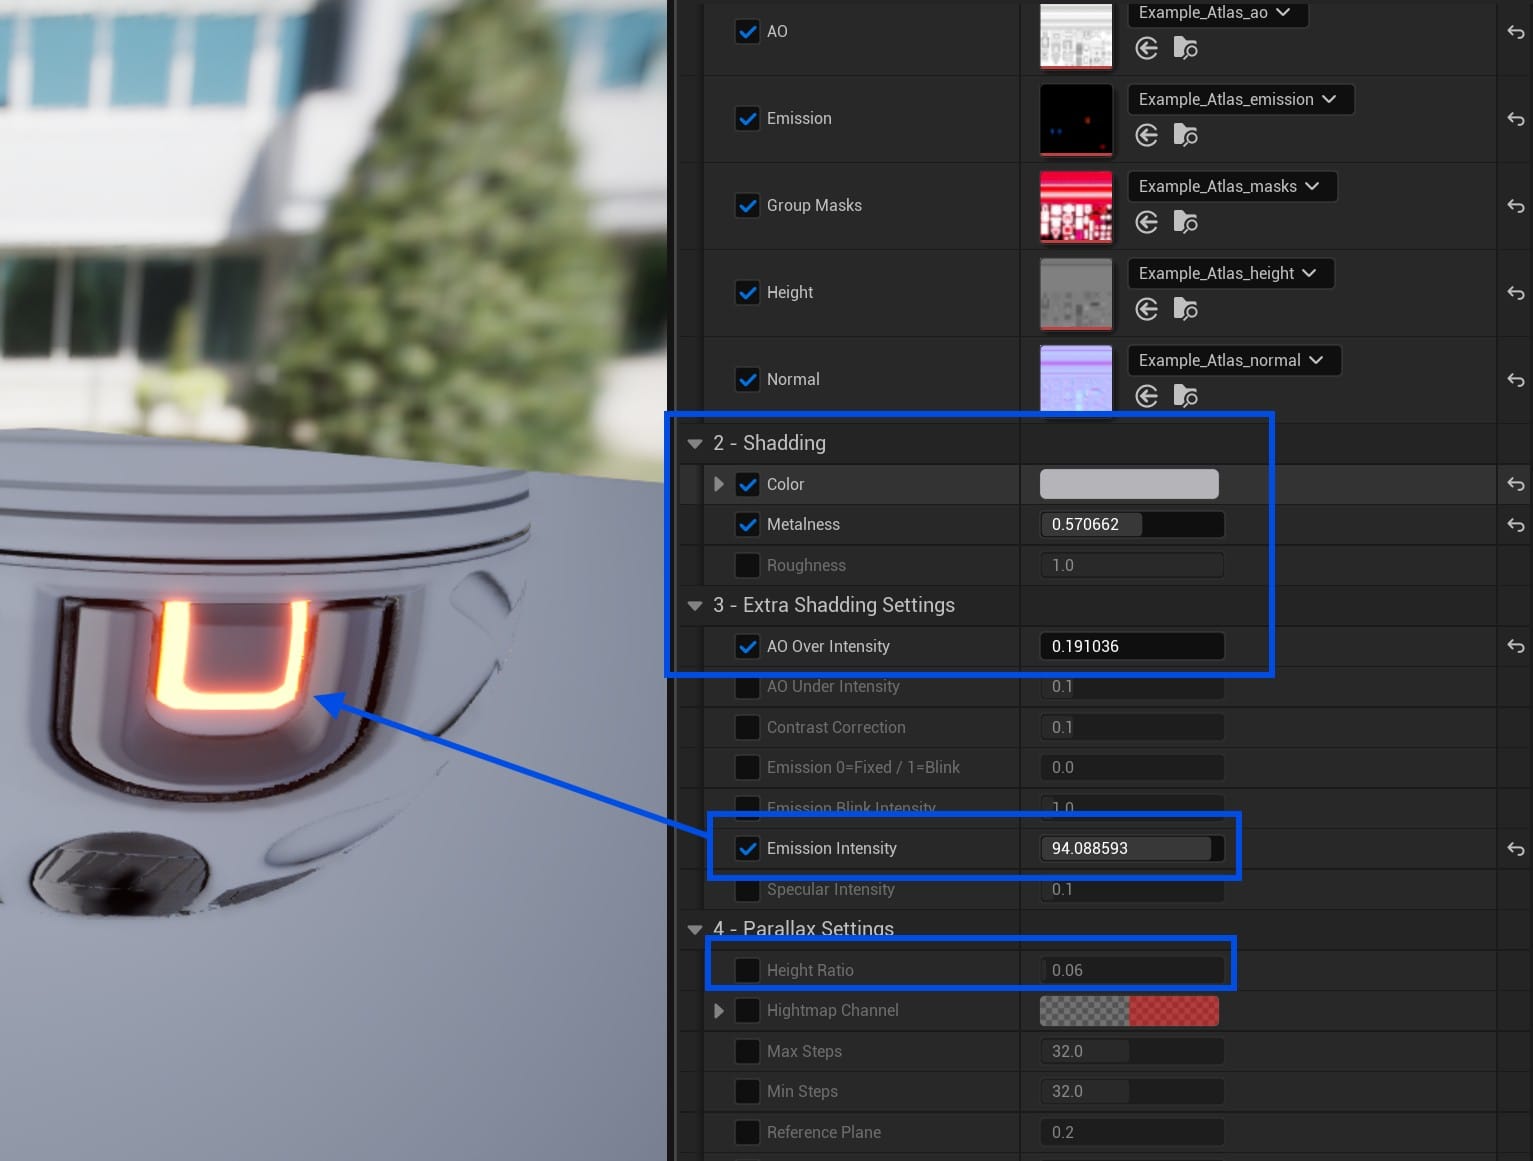
You should instantly see ALL of your decals (both subset as well as transparent decals) appear correctly and blended in with the base material as well. For the emissive decals as seen in my example you will also need to enable these options on the instance material:
What's great about this approach, is that once you have set up these 3 shaders, you can re-use them very efficiently with any other models that share the same atlas (such as the orange cube at the top of this post). The only thing you need to do, is simply set the material slots for the model to be the already-set-up instances materials. That means that once the instance materials are set-up, its a relatively simple and few-clicks-process to import.
I hope this was useful to someone out there :)


